How to make an audition video without spending a fortune
Tis the season for audition videos!
It wasn’t always this way. Let me do my best Church Lady impression: Back in my day, we didn’t make videos for college auditions! We drove the interstate to every school and played fifteen concertos at each one, and we loved it!
But times have changed, and serious music students are applying to more and more schools during their senior year. And faculty at those schools still have the same (tiny) amount of time to hear live auditions. The solution? Make everyone submit a pre-screening video to limit who gets those coveted audition spots!
That would have been a grossly unfair requirement when I was applying to schools back in 1996, because very few students had the means to produce a video that didn’t look like a local-access cable show run through the VHS duplicator.
Wow, Dana Carvey again!
But today, it’s easier than ever to make a video of your playing that looks and sounds professional. You don’t need lots of money to pull it off. But you need to know where to put that money so it really counts.
What is the pre-screening committee looking for?
Before you make a video, you should know what kind of video your audience (the committee) wants:
Committees want to see and hear an accurate representation of you and your playing.
That’s it! Your video succeeds if the people watching it feel as though they’re hearing you live. It fails if it gives a different impression, either deliberately (because you tried to fool the committee) or, more likely accidentally (because of poor picture or sound).
Here are the three basics you need to nail so that the committee gets an accurate impression of your playing:
A normal frame
Your audition video should focus on you. Don’t include the entire room in the shot, even if it’s a stunning cathedral, because you will appear too small in the video. And don’t zoom in so close that your body doesn’t fit in the frame. Committees need to see how you get around your instrument in addition to hearing your wonderful playing.
Shoot from a normal perspective.
In other words, treat the camera as you would an audience member: give it a good seat for the show! Don’t make a committee look up at your chin while you play. Don’t ask them to look at your back. Put the camera just where you’d like to sit or stand as an attentive listener.
Decent lighting
In the old days, you had to worry a lot more about light when making a video. How much? What color? With today’s digital sensors, those are practically non-issues. As long as you are easy to see, and there aren’t any light-related distractions in the frame, you’ll be fine.
Sound that faithfully represents your playing
Audio is more difficult to get right than video. Again, you don’t need to spend tons of money to get good sound, but you do need to understand some basic principles of sound recording. Just know that if your budget is limited, you’ll get better results putting most of it into your audio. Here’s why:
Video is the easy part
Weird, isn’t it? Historically, after all, audio recording came well before moving pictures. And anyone old enough to have used a dial-up modem will recall that video was out of the question in the early days of the World Wide Web. When video finally started appearing on web pages, it was postage-stamp sized and the quality was pathetic!
Rest assured that nowadays, it’s easy to capture quality video. You just need a camera (which could be a smartphone), something to hold the camera, and light.
The camera
It doesn’t particularly matter what kind of digital video camera you use. Imagine that: when making a video, your video camera is one of the least important factors.
It’s true! A cheap camera or a smartphone will work just fine. Of course, there are expensive (and ultra-expensive) video cameras out there, but we won’t see much benefit for our purposes. Expensive cameras are expensive for reasons that go far beyond the scope of an audition video.
Pro video cameras include features like the following that are critical for big-money productions:
The ability to use pro lenses
Directors need many different lenses to get just the shots they want, so their cameras need to be able to accept those fancy lenses. You won’t need such a lens. While limited depth-of-field is a nice feature (you’re in-focus while the background is blurred), it’s overkill for your audition video.
Ultra-high resolution
Even smartphones can shoot in HD these days, and that’s more than enough for an audition video. Pro cameras shoot ultra-high resolutions so that the big-budget projects they capture will be ready for any audience on any size screen. If your audition video ever gets viewed by a wide audience, it will either be because you’ve hit the big time, or because your video was really entertaining… in a viral way.
Pro usability
Big-budget projects can’t risk downtime due to malfunctioning equipment. Pro cameras are built to handle moisture, heat, cold, sand, you name it. You won’t need to worry about any of that (please don’t shoot your video on the beach)! In addition, big-budget projects use manual focus. There’s a guy whose job it is just to pull focus all day long. Therefore pro cameras include manual focus knobs that are easy to “mark” for focal distance. If you’ve ever heard of an actress hitting her “mark”, it means she moved to the right spot at the right time for the focus puller. You won’t be moving (much), and just about any camera can detect your face and focus automatically.
So if the previous features are things you don’t need, what do you need for your audition videos?
Camera support
The camera shouldn’t move. At all. If you’re using a dedicated video camera, it probably came with some kind of tripod. If you’re using a smartphone, you can find tripods and other supports at Walmart, Target, or on Amazon.
Relativity of light
This sounds like an Einstein theory, but it’s a lot simpler: out of everything in the frame, the best-lit thing should be you. As long as you make that happen, your camera will automatically adjust its exposure appropriately. Just watch for these two common mistakes:
Backlighting
If you have a strong light source behind you, your camera will almost certainly be fooled and you will show up dark on your video. You don’t want that. Position yourself so that the strongest light sources are shining on your front, your side, or some combination of the two.
Overhead light
In some rooms, the only light comes from directly overhead. That may look fine to our eyes, since they’re used to making adjustments and compensating for shadows. But if the lights are strong enough and narrow enough (like spotlights), those shadows get pretty harsh. And on video, you’ll end up with dark shadows under your eyes and chin.
This isn’t as big a deal as total backlighting, but it’s still something to avoid when possible. If you’re stuck with overhead lighting and a dark floor, you may consider putting a large piece of white paper, aluminum foil, or another reflector on the floor below you. Just make sure that reflector doesn’t appear in the shot!
Battery power
One last note about cameras: whenever possible, run on battery power and bring spare batteries. AC power lines carry noise, which will find its way onto your recording if you’re using on-camera audio (which you really shouldn’t be–read on to see why).
Power lines are also susceptible to outages and power spikes. For example, if you’re on AC and someone turns on a light somewhere else on the same circuit, your video may dim momentarily.
Audio: where planning matters
There are a million great cameras out there, from your smartphone to a rig costing tens of thousands of dollars. Not one can capture pro audio on its own.
How can that be? you ask. That makes no sense!
It does if you understand two facts:
- Most folks don’t care about audio for their video
- Those who do care use a separate device for audio, so there’s no incentive for camera-makers to build good audio into a camera
It’s a self-perpetuating cycle, I’ll admit. One day, we’ll all band together and demand a single device that will capture amazing sound and picture together! But until that day, remember that unless you separate your audio from the camera, you will have mediocre results.
The ideal setup
When money is no object, here’s how you capture audio:
- A wonderful-sounding room
- A dedicated audio recorder
- Multiple expensive microphones
- Optimal microphone placement
- Minimal processing
Makes sense, right? Pick the best of everything. But you can get great results even if you cut a few corners. Here are the different variables and how much they matter.
The room
The room you use will shape all of your other choices. A great space means that you don’t have to work as hard for great sound. But you’d be surprised just how much you can get out of a space that isn’t ideal!
The basic idea is this: the better your room sounds, the more flexibility you have with your microphone placement. That’s it in a nutshell, whether your microphone(s) are attached to your camera or, better yet, separate.
If you’re recording in a concert hall, you can put a single microphone in the middle of the hall, far away from you, and call it a day. That’s because the hall is designed to sound great where the audience sits.
Recording in a parking garage instead? Try putting a mic 30 feet away and all you will hear are reflections: echoes of echoes. Recording space and microphone placement go hand in hand.
A “too dead” space is far preferable to one that’s “too live”. That’s because if you have to, you can add reverb. But you can’t take it away.
The worst rooms are small and contain all hard surfaces and right angles. A garage is a perfect example. Without some kind of sound treatment (sound dampening), don’t even think about trying to get good results in such a room. You’ll be wasting your time.
The audio recorder
A digital audio recorder should do just that: record audio and nothing else. That’s because the more complex a machine gets, the more ways it can fail. Today’s digital recorders use memory cards, so there are no moving parts. They run on disposable batteries, so there are no power issues. They aren’t running Facebook, so they don’t crash. Yes, a DAR will be your best friend when making your audition video!
The microphones
It shouldn’t be a surprise that you get better sound with better microphones. And we’ve already covered the fact that video cameras don’t record great audio because they have crummy microphones built in. Simple, you think, I’ll just plug in a nice external mic!
It’s not so simple. As noted above, there hasn’t been much consumer demand for pro audio on-camera. Therefore the audio-in connections included on most cameras are not professional-grade. Even if you were able to find an adapter that would accept your nice microphone, that adapter cable would likely introduce noise. And that would defeat the purpose of the nice mic!
The bottom line is that if you’ve spent any money on a decent microphone, you don’t want it plugged directly into your camera. Yet another reason to use a dedicated audio recorder!
Quick note: Recently, some cameras have begun including XLR or mini-XLR connections, along with phantom power, to allow professional condenser microphones to plug directly into the camera. This certainly makes syncing the audio and video easier, but cameras that include these connections tend to be expensive. You might decide to spend less on your camera, more on your mic and digital recorder, and sync the audio later using free software.
This post isn’t the place to go into the detailed aspects of different microphones, but in general you get what you pay for. Better microphones capture more desirable sound, without introducing hum, static or other noise.
It’s worth noting that some expensive mics do impart their own “flavors” to the sound; professionals pay a premium for the flavors they like best.
In addition, while most inexpensive microphones are omni-directional, meaning that they pick up sound coming from everywhere in the room (including potentially undesirable reflections from walls and the ceiling), quality microphones come in many different “patterns”, letting you choose which sounds to pick up.
One standard pattern is cardioid, which allows the microphone to largely ignore sound coming from behind it. If you have an average-sounding room and only one mic, you want it to be a cardioid.
The directional aspect of microphones leads into the next major advantage of using off-camera audio:
Microphone placement
Getting your microphone away from your camera works wonders for your recordings. For one thing, cameras make noise and that noise can get onto your audio track. But even if your camera were silent, why assume that the camera’s viewpoint is the best place to “hear” the music?
Again, if you record in a concert hall, then you can stick your camera in the expensive seats and put your mic there as well. You’re pretty much guaranteed a good sound. But what if you’re in a smaller room with sound that’s not ideal?
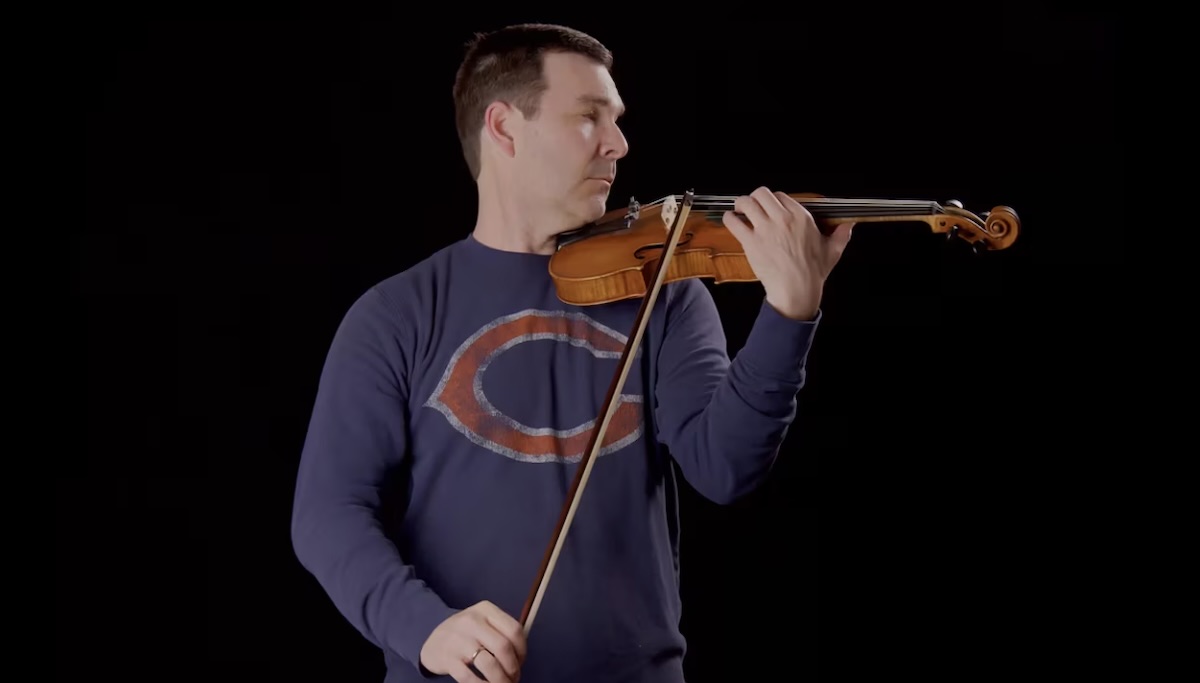
Here’s the beauty of using off-camera audio: you can put the mics wherever you want! When I make YouTube videos in my garage, you’ll see that I often wear a mic on my shirt lapel. It sits about six inches from my voice and my violin. I put the mic there because if I put it further away, you’d hear more of my garage and less of me.
It’s what you might call a “close” sound. It isn’t ideal for audiophiles, but it’s honest (and it happens to be perfect for teaching videos where I want to replicate the sound violinists hear under their own ears).
So go for the best space you can, but don’t throw in the towel if you can’t get a concert hall. Just get creative with where you place your microphones!
Processing
Ideally you won’t need much help “post-production”, but conditions aren’t always ideal. Processing takes that close, direct sound and “helps it out” in a subtle way using software.
The key word is subtle. Committees aren’t fooled into thinking you have a huge sound just because you hit the “cathedral” button in post! But a bit of warmth and reverb can make a close sound work quite well.
Your action plan
You may have all or most of the equipment you need to make a fantastic video already. The playing… that’s the real trick, isn’t it? Here’s a quick step-by-step that summarizes the above info:
- Choose your room, avoiding tight spaces with too many hard surfaces and right angles
- Notice where the light comes from and plan the location for you and the camera accordingly
- Get a reliable support system for your camera and set it up in a nice “audience member” spot
- Check the frame for lighting distractions such as backlighting
- Use a Digital Audio Recorder but keep the mediocre on-camera audio as a backup
- If using external microphones, place them based on the size and type of room you have
- Sync the video with your separate audio track, and process minimally using software such as Audacity (free) or Adobe Audition (subscription)
Have you made a video of your playing? Let me know how it went in the comments below!
Comment section
20 thoughts on “How to make an audition video without spending a fortune”
Leave a Reply

Scales: The Road
to Repertoire
Even if you’ve never played a scale before, violinist Nathan Cole of the Los Angeles Philharmonic will guide you through scale routines that meet you where you are, and build progressively alongside your playing.



Hi Nate! Do you have recommendations of specific DAR models that are at the level needed to pass a pre-screen at a good music school or an orchestra audition? Thanks!
Pretty much any DAR gives you the capability to record great-sounding audio if you’re wise with microphone placement. Then it will be up to the playing! But I like the Tascam DR-40 since it will “grow” with your budget. It has its own internal mics, but even better, it has XLR inputs that can function as mic-level or line-level. That means that you could use the Tascam’s internal pre-amps or your own.
Thanks so much for this helpful tutorial. I’m curious, what is the name of the lapel mike you use?
It’s a DPA 4061, great and tiny mic!
Great post-very helpful! Have you looked into the Zoom q8 or q4? They’re pretty high quality cameras that have a great Zoom audio recorder built in. I’ve had good luck with mine!
I like the Zoom products! As an all-in-one, it’s certainly better than most video cameras since the audio is a big step up. But every all-in-one solution has the same problem, which is that your audio is tied to your video placement. If you have a smartphone, I still think you’re better off using its video and putting that $200-350 toward audio alone.
“The best mics do impart their own “flavor” to the sound; professionals pay a premium for the flavor that they like best.”
Sorry, but this is wrong. Any mic can impart a “flavour” it is down to your choice of mic as to what flavour you get and this has nothing to do with the price. What you are after for your audition tape is a neutral mic that accurately picks up what you play, speak or sing in your chosen acoustic without adding anything to it. You will be found out very quickly if you live audition does not match your audition tape.
If you are that short of money, yes the smartphone can produce good video results but then why not hire a local sound person for half a day to get the audio right. No travel costs, minimal kit, you walk away with a USB stick at the end of the session with several versions of your pieces. You can spend the following day on your computer stitching it all together.
Just for the record, my own feeling about video auditions is that they are wrong since it can skew the results with judges prejudices on what they see rather than the quality of musical performance.
Regards,
The quote you picked out isn’t wrong, but out of context it’s certainly incomplete. The sentence right before that says, “Better microphones capture the same sound that you hear with your own ears, without introducing hum, static or other undesirable noise.” To clarify, I might have said that every mic has a flavor, and you should pick the one that represents your playing most faithfully. If every great mic was 100% neutral, they would all sound the same and nobody would have a preference for one over another. But audio pros certainly have their favorites!
As for hiring a pro, it depends on how many videos you see yourself making. If you find that you enjoy putting the time into learning some of these basics, you may be able to rely on yourself for lots of videos to come! But going the pro route certainly takes the stress and effort out of the process.
What you say about video auditions is certainly true… but I consider it a step up in fairness from audio auditions, because even 20 years ago when I was in high school, kids and their families would pay top dollar to splice those recordings. At least with video, it’s harder to misrepresent your playing since cuts and splices will be obvious. An imperfect system, but for those who participate I want them to be able to put their best foot forward!
Thanks for your thoughts!
Do you have suggestions for video editing software, free or paid or otherwise, for Windows or Mac? I find that a lot of the programs that I use are unclear about whether they proportionally shrink the file size or change the audio quality, which is most important for us. Specifically, I am really only looking for a program to cut a run out of a long video and splice multiple takes together (fade in/fade out in between), but I know many will be looking for programs to add reverb, etc.
I use the Adobe suite of apps, since with an educator’s discount it’s only $20 per month. So for video it’s Premiere Pro and for audio, Audition. They are both great, professional-grade apps. But Audacity is the wonderful free audio program that’s cross-platform.
I’m more familiar with Mac these days, and since iMovie is the default video app there, it can do those basic things you’re talking about. And you can control file size and format if you know which options to look at. You don’t have as sophisticated control over those things as you would with the Adobe apps, but you can certainly output a quality file if you have good quality source material!
Great article. I’m wondering how difficult it is to sync the audio to the video when recorded separately? Is there a way of time-coding it so a video editor can do it automatically, or is it a case of moving it around until it fits?
The actual time-code method is a feature of pro gear that’s beyond the reach of most of us. But it isn’t that tough even in the free software such as Audacity. The important thing is to go ahead and capture the camera’s audio, even if it’s bad quality. That way you have a reference track when you’re syncing. You play both tracks at the same time and keep shifting the “good” audio until you don’t hear them as separate tracks any more. Really only takes a minute, and if you’ve recorded everything as one long “take” you only have to do it once.
With Adobe Audition, it’s even easier. You simply select both tracks and use the Sync feature to line them up based on the audio tracks. It will do it automatically!
One other easy way to do this: when you hit record and then stand or sit where you will be for the recording, clap once, wait a few seconds, and then once more. After the second clap, wait maybe ten or twenty seconds and begin your performance. In the editing, sync up the claps-because they’re so abrupt and percussive and accompanied by a decisive visual movement, it’s pretty easy to do and then everything should be dead on. Then after it’s all synced you just cut out the first part of the video so that it no longer includes the clapping.
Thank you so much for these tips! Your article is a huge help for me because I’m making summer camp audition videos next week. 🙂
Thank you, glad you found it in time!
What a great website for so many people that need to video-tape themselves. I find myself to be kind of shy and introverted the moment the camera is locked on me. I wonder if anyone out there practices talking (days) before they will tape. I find it easiest to just act and proceed as though I am talking to a person, while looking at the camera. I find that when I outline (right notes) on paper a few days beforehand, gets so many factual points in the forefront of my mind and (as I would do just talking to another person), I can simply talk through those points. My thinking is that if I miss some key fact or point, I can always do it over again. Also, great point about clapping the hands. You can also pluck a string as well: You can see the finger touch and release and then match it to that sound for sync.
Yes, this is a great technique as well for public speaking. Musicians often forget that we are communicating with an audience, even if that audience can’t see us!
Would you still recommend the DR-40 or DR-40x, or do you have other preferences now that some time has passed? I’m looking for a setup for a viola audition for an advanced youth orchestra and for routine practicing use. It likely would be used for remote lessons given the state of things now with quarantine. I’m hoping the built-in condensers would be good enough for all of this, but if not I like that the DR40 has XLR inputs and ghost power. Thanks for pointing that out!
(I’ve tried to find your subsequent blog post in which you discussed specific equipment, but can’t find it. Could you post a link to your blog post?)
Hi! You’re right, I didn’t write that follow-up post yet, but this is a nice reminder. I think at the price point, that recorder is great. The best features are the XLR inputs and phantom power. It’s better if you can put a quality preamp in between the mic and the recorder (to improve on the internal pre-amps).
Reply to Ed’s question: As it is a music audition, consider getting a recorder with much better ( more musical, less “digital sounding), quieter ( less “noise” from the circuitry in the background that is heard during pauses or quiet passage) set of mic preamps and analogue-to-digital converters. I’m suggesting one I use myself to record solo piano, ensembles and even symphonies. The Tascam DR100 MkIII can be found during frequent specials like Fathers Day now…for $299.99. Really easy to use and it has an inboard recharegeable Lithium batterey that records up to 3 hours….plus 2 AA batteries as backup. Also the built in cardiode mics are actually usable…I discovered this when in an emergency I used them to record a harp performance ( ugh! I arrived late and did not have time to set up my XLR mic wires, mics and stand )….and the results were appreciated all around.